The smaller components get the tricker the soldering process. Through-Hole stuff is pretty forgiving, but if I attempt to solder something surface mounted, my shaky hands are not cooperating. For the last 3 years, a “3rd hand” had been keeping stuff suspended while I solder. It was the cheapest stand you could possibly get.
I’m pleased to say, I have upgraded to the 2nd cheapest you could get! And it has “features”! Meet DANAIU Soldering Stand!

Soldering enrichment centre
Apart from the slightly “lab looking” stand I picked up more soldering accessories because my office seemed very under-equipped. Recently the TS80 portable soldering iron (review)has joined the toolbox, so I stocked up on some basics:
- Soldering Stand
- Conical tip for TS80
- Multimeter
- Flux Pen
- Solder with flux core
- a copper sponge with resin bath
- heat shrink sleeves
- single-strand wire
That should keep me going for a while, especially that I already own a soldering station (Yihua 922DA+ review).

2 out of 3 people thought it was £100
It’s not a magnificent stand, but for roughly £10, you can be very forgiving. A couple of my friends (who don’t have a clue what was it, to begin with) thought that the stand was worth around £100 due that white “lab” look. Apart from being a decent conversation starter, this stand comes with “features”:
- a clamp (it’s a bit cheap looking but…)
- LED lights (both USB powered and 3x AAA)
- a magnifying glass with extra zoom bubble
- decent clamps
- tray
- sliding adjustments
Whoa! I could work for the PR team for this soldering stand (I bought it out of my own money and I’m not getting paid for the praise, I swear)!
USB passthrough
Since I have USB powered TS80 portable soldering iron, I wanted to add a simple USB passthrough so I could power the LEDs and the soldering iron from my Xiaomi 10.000mAh QuickCharge 3.0 battery (review soon).
I found this 5V to 3.3V converter which is actually able to deal with 9V that QC 3.0 delivers in the power-on mode. I dremmeled out a slot at the back for the female USB-A socket (USB 2.0 is sufficient), secured it with hot glue and wired it to a USB cable.
VCC and GND strands were also used to connect to the buck converter. It was getting a little hot, so I slapped a small heatsink I had for my Raspberry Pi ICs. The 3.3V from the converter is used to power the LEDs.
To complete the hack, I added a welded stand from an M5 bolt and 2 washers. It holds the smaller iron in place neatly.

An elephant with a short trunk
The stand is sturdy, but I will put some batteries in only to increase the weight of the base. It should last me longer than the previous one, especially thanks to the design of the clamp. These are placed inside the O ring instead of just wrapping around a rod (and slipping in the process).
The ring light is decent, magnification is ok, the bubble could be useful for inspecting the quality of the SMD work done on the board. I’m pretty much done with the review.
There is an elephant in the room. It’s white and some say for £100 this elephant should come with a much longer trunk! The arm that supports the lens (and the LEDs) is way too short! I have to hunch significantly to take advantage of the O ring light and the magnifying glass.
3D printing to the rescue

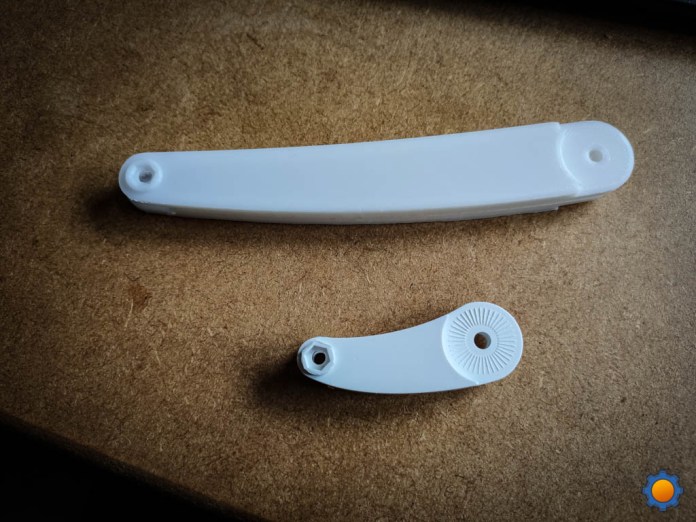
Having a 3D printer (Creality Ender 3 review) at home is like living on board of Enterprise of StarTrek. Granted, it’s a slow process, but after an evening with Fusion360, I woke up to the sight of a new extended arm for my soldering stand.
The recap:
I disassembled the arm, took basic measurements and used a picture of the arm as the canvas (background) to have a reference. Because 13 is a lucky number (not) I thought it would make sense to set this as the distance between the hinges (the original is 3 times shorter, have fun dividing 13 by 3 😂🤣😂 , I know I’m mean!).
The rest is history! If you by history means 30 min of carving the prototype with a sharp knife to make it fit, then redesigning the model accordingly!

Let it be light
With great trunk come… problems with LEDs, If you scale one thing 3 times, you probably find out that other things have to grow too! In this case, the LED cables were too short.
Instead of splicing the wire near the hinge (lazy job, I did that for prototype) I took the stand apart (it’s easy) and spliced the wire internally! After a quick test, I was ready to assemble the stand
Final result

The soldering iron holder is too big for my TS80! 🤦♂️ I’ll fix that next time! What do you think guys? You can download the modification from Thingiverse and if you have any comments, leave it in this Reddit thread.

3D File (.stl)
This project had been printed on my Creality Ender 3 (review) which was upgraded with my favourite mods.
Filament:
Time to print:
Filament length:
Estimated Cost:
PLA
2h 39min
5.09m
£0.25
.


