After using Grafana and InfluxDB for some time, I quickly discovered that time-based databases are great, but can be limited in use. They are great for plotting sensor charts over time but less suited for displaying other types of data. My next step was to explore more SQL-like options to fit my further automation needs. Postgres in NodeRED could really use a good tutorial. It took me days to gather all information, and start using it. I know what I’m doing, so it’s time for a tutorial.
Why Postgres (PostgreSQL)?


It’s difficult to use InfluxDB and Grafana to plot multiple charts in the same panel when each test had been done on a different date. I’m sure it’s possible, but not without complex time recalculations. I tried to use an array with elapsed seconds [1, 2, 3, 4...] and substitute that as my timestamps, sadly, Grafana has had none of it. It insisted on providing correct timestamps to chart my curves.

This is where SQL databases come in. Storing data in tables which don’t rely on the timestamp order allows me to query and retrieve the data in any preferred order. In this instance, I could simply retrieve sequential temperature reads for each Raspberry Pi case testes and stack them all on the same timeline without much fuss.
Postgres vs SQL
I picked Postgres and NodeRED for a couple of reasons. Typical SQL databases have limited datatypes (types of data that can be stored like integers, strings etc). Postgres supports arrays and JSON-formatted datatypes. It suited my 1st use case great, as I could store all my Raspberry Pi case tests in a single table, which contains temperature benchmarks stored as an array datatype.
My second reason for using Postgres in NodeRED is more practical. Postgres is simply supported in the free tier in Grafana, unlike other competitors, I looked at. I can still use Grafana to plot my fancy charts and get away with not paying a penny for the database or dashboard integration. A win-win for any home automation enthusiast.
Not what I wanted?
Over the course of my Postgres experiments, I discovered one shortcoming with has more to do with Grafana than the database itself. I hoped that I could substitute any data as X & Y to Grafana to plot the charts, but each time Grafana refused to let me map my custom array as elapsed time. If you know the answer to this mystery, I’m all ears.
Postgres already supports various time formats, but it was not what I wanted, I already have InfluxDB for time-based data, so my last line of defence was to use the good old Dashboard Chart node. This node takes virtually any data type and will attempt to plot it – even if it makes little sense:

Thankfully, it can also display more logical curves! – We will get to that later.
There is one more point to address – why am I using Postgres for my project? It’s true, that I could get away with using a built-in variable store system in NodeRED. While possible, the method isn’t scalable and much harder to maintain than sending all that data from various boards to a single location. After all, the Postgres database doesn’t have to be hosted, on the same as test, computer.
Installing Postgres on a Raspberry Pi

To get started with Postgres in NodeRed, you will need it to be installed on your Raspberry Pi (or whatever Linux machine you have at hand). It’s a relatively simple process. Open the terminal and run the setup commands:
sudo apt-get update
sudo apt-get install postgresql
To access the database shell you have to use the default username first:
sudo su postgresBear in mind, that by default databases created by the user are linked to that user and Postgres will try to load it automatically when called from psql command. If you create a database as Postgres, you will have to switch to that user each time. You can access the database of your choice through: psql --username=pi --dbname=databasename
You can create your first database with:
#access postgres
psql

#create database
CREATE DATABASE databasename;

#to exit use:
exit
Postgres have a set of handy shortcuts that you can use to interact with it, I have included the most useful below, but if you want to check almost all of them, there is a handy cheat sheet online.
This is optional, but at this stage, you can add users for each created database:
#create a new user
CREATE USER your_username WITH ENCRYPTED PASSWORD 'your_password';

#create a new user that can creatde databases
CREATE USER your_username WITH ENCRYPTED PASSWORD 'your_password' CREATEDB;


#if you want to add new user to your table (not database) you can use this command - requires table to be exist first:
GRANT ALL PRIVILEGES ON your_tablename TO your_username;
Postgres remote access
I’ll have my database running on my automation server – so I need to enable remote access for Postgres. By default, you can only submit the data from your localhost. There are 2 files to configure to enable that. The location of the files will depend on the version of Postgres installed on your machine.
sudo nano /etc/postgresql/13/main/pg_hba.conf
sudo nano /etc/postgresql/13/main/postgresql.conf

#13 - version number - this may change so navigate to postgres dir and use 'ls' to confirm
postgres.conf
At the top of the config file, you’ll need to edit IP addresses Postgres will listen to, uncomment the line and specify one of the configurations
# - Connection Settings -
listen_addresses = 'localhost'          # only machine hosting the database
OR

listen_addresses = '*'          # all IP addresses can query server
listen_addresses = '10.0.0.50'          # only this IP address can query server
listen_addresses = '10.0.0.50 10.0.0.51 10.0.0.53'          # only these 3 IP address can query server
save your file and proceed to the next configuration file in the same location.
pg_hba.conf
At the bottom of the file, you’ll find the options to allow connections from specific IP ranges. You will need to specify a line for each connection range. If you want to add remote access to the present configuration, simply add a new line, replacing the localhost entry removes the access of the hosting machine to the database.
# IPv4 local connections:
host    all             all             127.0.0.1/32           md5    # this is default value for localhost
host    all             all             10.0.0.1/8               md5    # only 10.x.x.x IP range
host    all             all             10.1.0.1/16             md5    # only 10.1.x.x IP range
Select your IP range (mine is 10.0.0.1) and edit the file accordingly, then save the file and reboot your Raspberry Pi or restart the Postgres process.
Postgres in NodeRED

Now that your database is running, it’s time to connect to it from NodeRED and start storing and retrieving data. To interact with Postgres in NodeRED I’ll use node-red-contrib-postgresql – head to the palette manager to install the node. You can also grab a sample of my flow used in the tutorial from this link.
To connect to your database, you’ll need your credentials, & IP/hostname unless Postgres is hosted by the same machine. Take care when exporting NodeRED flows with Postgres node, as the export file, contains the password in plain text. Remove it from your exported JSON, or delete the configuration node for Postgres before the export.

If your circumstances are different, adjust the fields as needed. You are now set to interact with your database so let’s do just that.
There are 2 ways of interacting with Postgres in NodeRED – you can type each query into the Postgres node (aka the boring way) or use NodeRED to set everything dynamically. I’ll show you a mixture of both.
Create & delete tables
Each database stores the data in tables. It’s a dataset that holds your information in columns and rows. Instead of mundane examples, I’m going to walk you through my benchmark flow as it has different data types and structures.
This a table of sample data that I’m going receive for each test:
| Raspberry Pi case | Test Type | Temperature | Timing | Test Start |
| Argon Eon | idle | [25, 25.5, 25, 24, 25.51] | [1, 2, 3, 4, 5] | 1670160390 |
| Pironman | stress | [19, 20.5, 21, 24, 20.51] | [1, 2, 3, 4, 5] | 1670161200 |
In my case, each row is a test performed for each case. That test contains a good selection of data from simple types like strings or integers to arrays. I found it handy to create a mock table to understand better how I want my data to be stored and retrieved. It’s important as you have to define the datatype before you create your table.
I know some of you might be tempted to point out, that I could do away with my timing array as long as each temperature entry is logged at the same interval, but I decided to keep it – in case someone else wants to use less uniformed timestamps.
Create SQL table
Postgres stores data in structures called tables. These indeed look like your average data table with rows for each entry and columns for each datatype. A Postgres database file can contain multiple tables. Each table needs a unique name which is used to query it. You will notice below that my mock table has 5 parameters but the actual table takes 6. The additional parameter (id) isn’t entirely optional but each table requires a unique identifier. In this case, I created an id field and tagged it as SERIAL PRIMARY KEY – this means that each table entry (row) will get an iterated number assigned to it and this is how elements are identified.

Constraints simply check if submitted data meets requirements. You can learn about these here. In my example I used the PRIMARY KEY and not null, to make sure my datasets are always linked to the device name. Note that if your data type does not match the expected data type of your table/column – the whole query will fail and return an error.
CREATE TABLE thermaltest (
  id SERIAL PRIMARY KEY,
  device varchar(255) NOT NULL,
  test_type varchar(255) NOT NULL,
  temperature numeric[],
  timing numeric[],
  date DATE,
  fan boolean,
  ambient boolean,
  ambient_temperature numeric,
  sbc varchar(255),
  average_temp numeric,
  oc boolean,
  cpu_speed int,
  throttle int[]
);
I changed my approach during the project development, as I needed to know my id before the data is written into a table. The reason for the change was superficial. I only wanted to load the data I needed, rather than query everything just to find the correct id of the row in question. I’ll explain the significance of this later.
I could in theory make another database call to query it, but it was simpler to makeup, up a unique key each time a new entry is added to the database. Do you know what’s the easiest way of generating unique keys? Use a timestamp. It’s unique, and easy to capture and you can use it to extract the time of your database entry as well.
I ended up dropping the SERIAL part of the datatype and replaced it with BIGINT, as I no longer needed to iterate the value of my id.
The table is created once, so I simply hardcoded this directly inside the Create Table node. I’m going to cover dynamic updates further down. Each param in the CREATE TABLE query has the following structure:
#param structure
name | datatype | constraints
device varchar(255) NOT NULL,
Postgres allows the following datatypes to be stored:
- various numerals (ints, decimals and more)
- string
- byte
- network
- enums
- arrays
- JSON
- date/timestamp
- geometry
Each datatype has its own properties and limitations. Selecting the correct data type for your database will have serious speed and performance implications so take a moment to think about the expected values in your datasets. This guide expands on each data type.
Delete table
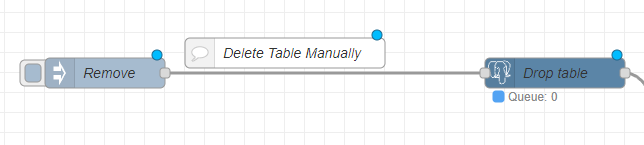
Deleting the table is easy. Too easy! Make sure you are deleting the table you want in NodeRED. There are no confirmations. Use the Postgres node and submit the query:
DROP TABLE your_table;Insert data

You can hardcode the query inside the Postgres node, but that’s not very practical. Most of the time, the data varies and I need to do this programmatically. To insert data manually, use the following query:
INSERT INTO your_table (device, test_type, temperature, timing, test_start)
  VALUES ('Argon Eon', 'idle', ARRAY [25, 25.5, 25, 24, 25.51], ARRAY [1, 2, 3, 4, 5] , 1670160390);
Note, that if id is of a SERIAL type and has a PRIMARY KEY attached to it, each data submission will iterate that field automatically. The order of values has to follow the order of names and the type of each datapoint has to be correct, otherwise, Postgres will reject the insert command.
I generated my id with var id = Date.now(), so I had to pass that as an additional parameter with my INSERT query.
INSERT INTO your_table (id, device, test_type, temperature, timing, test_start)
  VALUES (1670160390, 'Argon Eon', 'idle', ARRAY [25, 25.5, 25, 24, 25], ARRAY [1, 2, 3, 4, 5] , 1670160390);
Postgres and function node
To submit the same data programmatically, we have to modify the query and how we submit the data to Postgres in NodeRED. First, the data above has to be passed as msg.params – an array of elements which has the correct data stored in the correct order.
var id = Date.now();var device = 'Argon Eon';
var test_type = 'idle'
var temperature = [25, 25.5, 25, 24, 25.51];
var timing = [1, 2, 3, 4, 5];
var test_start = 1670160390;
... etc

msg.params = [id, device, test_type, temperature, timing, date, fan, ambient_temperature, ambient, sbc, average_temp, oc, cpu_speed, throttle];

return msg;
This data is passed over to the Postgres node which has its query set to:
INSERT INTO thermaltest
(id, device, test_type, temperature, timing, date, fan, ambient_temperature, ambient, sbc, average_temp, oc, cpu_speed, throttle)

VALUES ($1, $2, $3, $4, $5, $6, $7, $8, $9, $10, $11, $12, $13, $14);
Note that each value $1, $2 etc corresponds with the order of the data submitted by msg.params: $1 = id (1670160390), $2 = device ('Argon Eon'), $3 = test_type ('idle') etc. This is perfect for submitting complete datasets. For example, if I have a complete result of my test stored in NodeRED, I could save it to the database in one query.
Update Data

What if I don’t want to do that, and I’d rather save the data and update the database as the benchmark unfolds? There are benefits and disadvantages to this technique. Submitting all data at once costs fewer resources as you don’t have to make frequent calls. On the other hand, the call is more processing-heavy and you have to cache the data somewhere until the test is over.
Or…
You can save the data on the fly at the expense of frequent database calls but without worrying about losing your test progress or caching. Each technique has its strength and purpose. As my use case is relatively simple (I’m saving data every 3 seconds for the duration of the test) I can afford to do it on the fly. Plus it allows me to talk about update calls.
A manual update call would look like this:
UPDATE your_table
SET test_type = "stress"
WHERE id = 1670160390;
This would look up my table, locate the row where the benchmark is stored with the id 1670160390 and change the value of test_type to "stress". If you don’t include WHERE, the query will modify each existing row in this table and replace the value of test_type with "stress". You can UPDATE more than one row at the same time too if you are using the WHERE key which corresponds with multiple rows. If I wanted to update all my tests for the ArgonONE case (assuming I have completed more than one), my query would look like this:
UPDATE your_table
SET test_type = "stress"
WHERE name = "ArgonONE";
Sometimes it’s better to append the value than to replace it. In my case, adding the next temperature value to the existing array of the reading is the way to go. There is a function that will do just that:
UPDATE your_table
SET temperature = array_append(temperature, 37)
WHERE id = 1670160390;
You can also update multiple columns at the same time. For consecutive results of my CPU stress tests, I’d save the temperature and the timing of the test in a single call.
UPDATE your_table
SET temperature = array_append(temperature, 37),
    timing = array_append(timing, 16)
WHERE id = 1670160390;
This is where I also discovered a limitation of the Postgresql node. When using a manual query and trying to for example append the array the value entered in the query field must be of the same data type. It’s problematic, as for example, any integer typed into the query field will be treated as int and appending the value to the array of numeric types will result in an error. Fortunately, the Postgresql node is clever enough to change the datatype programmatically. If you submit the value as a variable, the error goes away.
And finally, you can use msg.params in the same way to achieve an insert query programmatically. My function node would look like this:
var id = 1670160390;
var tic = 44;
var temp = 12;

msg.params = [id, temp, tic];
return msg;
and the query with Moustache variables like this:
UPDATE thermaltest
SET temperature = array_append(temperature, $2),
    timing = array_append(timing, $3)
WHERE device = $1;
These are just basic operations and by looking up the documentation, you will find more advanced ways of interacting with Postgres in NodeRED. Let’s jump to getting that data back from the database.
Querying

The best piece of advice I can give to you is: to be smart about what data to retrieve from the database. Each call to the Postgres database will cost you precious seconds/milliseconds and make or break your project. ALWAYS query for the smallest dataset possible. In your first project, you will get away with querying every bit of data stored in your database, but with time, you will regret that.
SELECT * FROM thermaltest;The line above read every single row and column from my database. * – means everything. It’s tempting to load everything at once to NodeRED and cherry-pick information as needed. It’s the approach I adopted at first, knowing, that I would end up with 100 rows in my database at best. But I love making my life more “difficult” I ended up re-writing some of my code to do this properly.
My table stores the following content:

A smart way of getting this information without asking for stuff I don’t need just yet would be (note not all of that info ends up in my table, but it’s used for some background processing):
SELECT id, device, test_type, fan, ambient, ambient_temperature, sbc, average_temp FROM thermaltest;I can limit my scope even further by using extra operators and sorting data. I could display the top 10 results by average temperature with:
SELECT id, device, test_type, fan, average_temp FROM thermaltest ORDER BY average_temp LIMIT 10and call the full dataset for a specific row with id = 1670160390;
SELECT * FROM thermaltest WHERE id = 1670160390;You can read more about how you can modify the database queries in Postgres in this post. The last call is where, I would benefit from a variable instead of my id, as with each call, the id is likely to change. As before you can achieve this with msg.params.
var id =   1670160390;
msg.params = [id]
return msg;

#Postgres query
SELECT * FROM thermaltest WHERE id = $1;
One of the more unexpected behaviours when playing with Postgres in NodeRED was the data formatting on return. Numeric values returned by query were sometimes passed as strings. I’m not entirely sure what was the reason behind this, but I had to convert some of these back to a Javascript number with Number();. It may not matter to your use case, but if you get errors when using Postgres data with mathematical operations, this would be my first thing to check.
Delete Row

Every now and then (especially in testing) it’s useful to delete the entire row. In a similar fashion, we can query Postgres and ask to delete a row in a specific table. Be careful, as there are no confirmations and once deleted data will be lost. You can select rows based on their id but also using other parameters. In my case, deleting a row which contains the name “Argon Eon” would wipe every row matching that name.
To delete the row manually, format your query in the following way:
DELETE FROM thermaltest WHERE id = 1670160390;Or specify the same query using the function node and query your database programmatically:
var id =   1670160390;
msg.params = [id]
return msg;

#Postgres query
DELETE FROM thermaltest WHERE id = $1;
Final thoughts
That should get you started with Postgres in NodeRED. I strongly recommend spending some time with Postgres documentation, as advanced queries can filter the data nicely for you and spare you processing all that information in NodeRED. During my Postgres experiments with NodeRED, I also discovered HighCharts – a JS library for advanced charting. But I will leave this for the next tutorial. Now, that I know how to use Postgres in NodeRED, I’m off to build my database of thermal benchmarks for all the Raspberry Pi enclosures I own. I’m already looking forward to my next video where I’ll be able to not only tell you the temperature of the CPU but compare it directly with other benchmarks. If you have any questions, as always leave them in this Reddit thread.


 server")

 Network attached storage under $21* #part1")


