Having your PC wired comes with many benefits, one of which is having the WOL functionality. Waking your computer remotely can be a great solution if you are lazy, or you need to access it remotely without keeping a 1000W machine running 24/7. What if your PC is not wired and the WIFI card does not support WOL services? You can use a Raspberry PI as a WOL (Wake on LAN) server. If you want to know how to connect your Raspberry PI to the PC, and assign a static IP you will find a guide here (if you not connected to the PC just yet) and here (if you are already connected).
Raspberry PI as WOL (wake on LAN)
You will need:
- Raspberry PI
- WiFi adapter if you are using RPI2
- Ethernet cable
The idea is to have your Raspberry PI running 24/7 instead, as it is more power-friendly, and act as a wake on LAN server. This way when the command is received by the RPI, it will use the ethernet connection to wake up the computer in question (or any compatible device on the network). Before you start, please make sure that your LAN adapter supports the WOL. You will find the settings in both Windows and BIOS depending on the computer you use.


The process of waking up the PC is fairly simple, we are going to use:
sudo apt-get install etherwake
This will take care of our needs.
Using etherwake

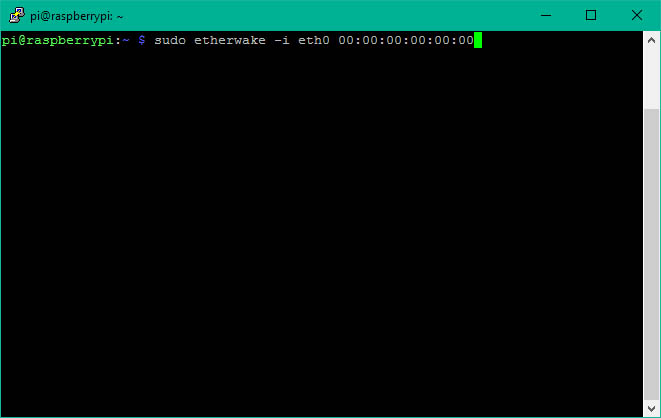
To wake up a PC simply use:
etherwake -i eth0 AA:BB:CC:DD:EE:FF
The (-i) interface is specified to push the magic packet via a correct interface. We want to force it through the eth0 rather than wlan0.

The AA:BB:CC:DD:EE:FF is the MAC address of the device you want to wake up. The WOL packet will be sent as a broadcast to all devices on the network. You can execute this line in the terminal, or use a simple bash script to open instead, that will do this for you
#!/bin/bash
echo "Going to wake up your PC''
sudo etherwake-i eth0 AA:BB:CC:DD:EE:FF
And save it as wol.sh then run it with sudo permissions:
sudo bash /path/to/file/wol.sh
Sending WOL command to the Raspberry PI as WOL
Now the hard part. First, we have to make sure the Raspberry PI has a static IP. Fear not, I already have a handy guide in here. Once you have the static IP with your router and the PC time to get the Raspberry PI visible outside of the network (skip this if you interested in WOL functionality over the local network only).
DNS

If you have a static IP, you can take a note of it, or go ahead and assign a DNS too. It will be easier to remember than a set of numbers. DNS is a more user-friendly representation of your external IP. So instead of connecting to 132.465.789.123 you are typing in something like www.gooogle.com.
Using services like www.noip.com you can create your own free DNS name – which will point to the external address. Service is free, but have to be refreshed every 30 days, a small price to pay. Check your current IP (google: my IP) and create an account, setup a DNS name that is easy to remember. If you have a dynamic IP, you will have to update it. The noip.com will provide you with the tools and an auto-updater. IP is likely to change every few days or a router reboot.
Port forwarding

To get the information from the internet to your Raspberry, you have to tell the router which device you are trying to address. I will assume that you have not changed the SSH port number (22 by default). Log in to the router admin page (usually 196.168.1.0 or similar) and find the port forwarding settings. You want to forward the port 22 to an IP that has been assigned to the WIFI interface. Each time we will try to communicate with your IP or DNS through the port 22, the router will send us to the Raspberry PI.
Sending the WOL command
Here you have few choices, obviously, you can log into the terminal, and issue the command manually or run the script (which also needs a command). From the mobile, you could use a JuiceSSH app that lets you do the same thing but from the mobile. You can also use Tasker to issue the command to Raspberry PI as WOL. Tasker plugins AutoTools and AutoRemote will let you do this with a press of the button, or link a more specific trigger. There is also a full guide here that explain how to connect AutoRemote and AutoTools to a Raspberry PI.
Tasker profile
You can use AutoRemote or AutoTools (or any other SSH client, that integrates with Tasker) to issue the command to the Raspberry Pi. The trigger is up to you really. You can link it to a button, you could use a voice command etc. Your imagination is the limit. I will show you how to wake up your PC from a local network and a remote location based on what network you are connected to.
The profile contains an AutoTool SSH action set up for the local network if we are connected to the local SSID, and the DNS name if the task is triggered from outside of your network. I already have a profile that assigns my %Location to a variable. So whenever I’m connected to my home WIFI – I’m home otherwise I’m not. This will decide if the SSH WOL command is sent via local IP or a DNS.

Project Download
Download project files here. Bear in mind that Patreon supporters have early access to project files and videos.


 Network attached storage under $21* #part1")


 and wake up any computer with an Ethernet adapter. Great if you WIFI card don't support WOL.)