When I received the first reTerminal – a CM4-powered HMI and industrial computer in one, I was impressed by how professional and rugged the device looked. I never imagined that this product would evolve into a line of impressive HMI (Human-Machine Interface) solutions for every situation. What took me completely by surprise was the release of the reTerminal E100X series, which incorporates not one, but two variants of popular e-paper displays:
Monochrome and colour!
Review Summary
Seeed Studio released a new reTerminal. E1001 and E1002 are e-paper-based displays that bring power efficiency to the forefront of the industrial design of the reTerminal series.
Pros:
- Brilliant e-paper screens
- Metal enclosure
- Good battery life
Cons:
- SenseCraft HMI needs more work

4/5
You can get yours now at: Seeed Studio: E1001 ($69), E1002 ($99)
Seeed reTerminal E1001 and E1002

They are “identical” with a single exception, so let’s start with that. The Seeed reTerminal E1001 brings a 7.5″ monochrome e-paper display with 800×480 resolution, while the more colourful sibling, Seeed reTerminal E1002, is fitted with a 7.3″ six colour e-paper display with the same resolution.
Other than this, the devices are identical, so let’s dive in.
Hidden secrets inside reTerminal E1001 and E1002

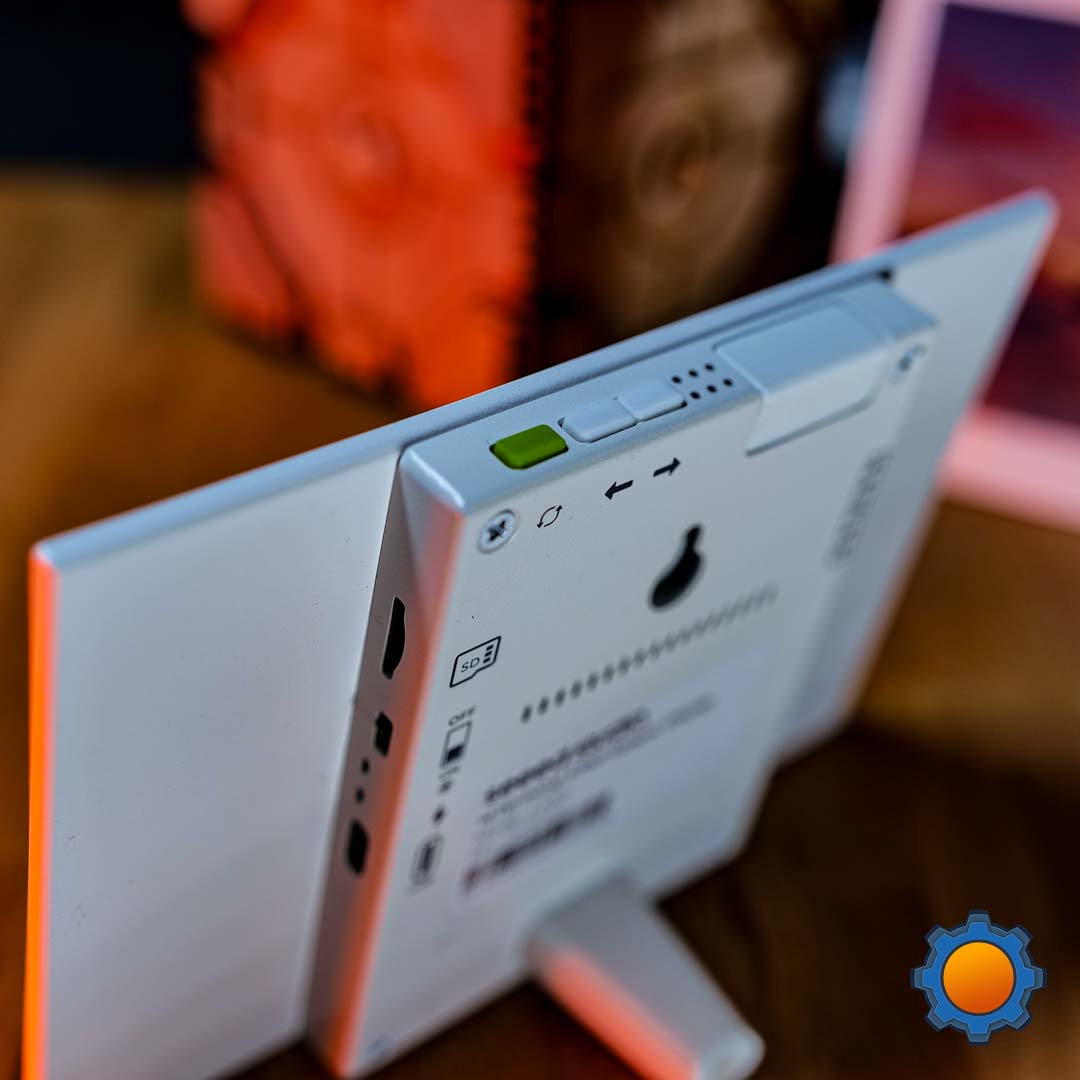
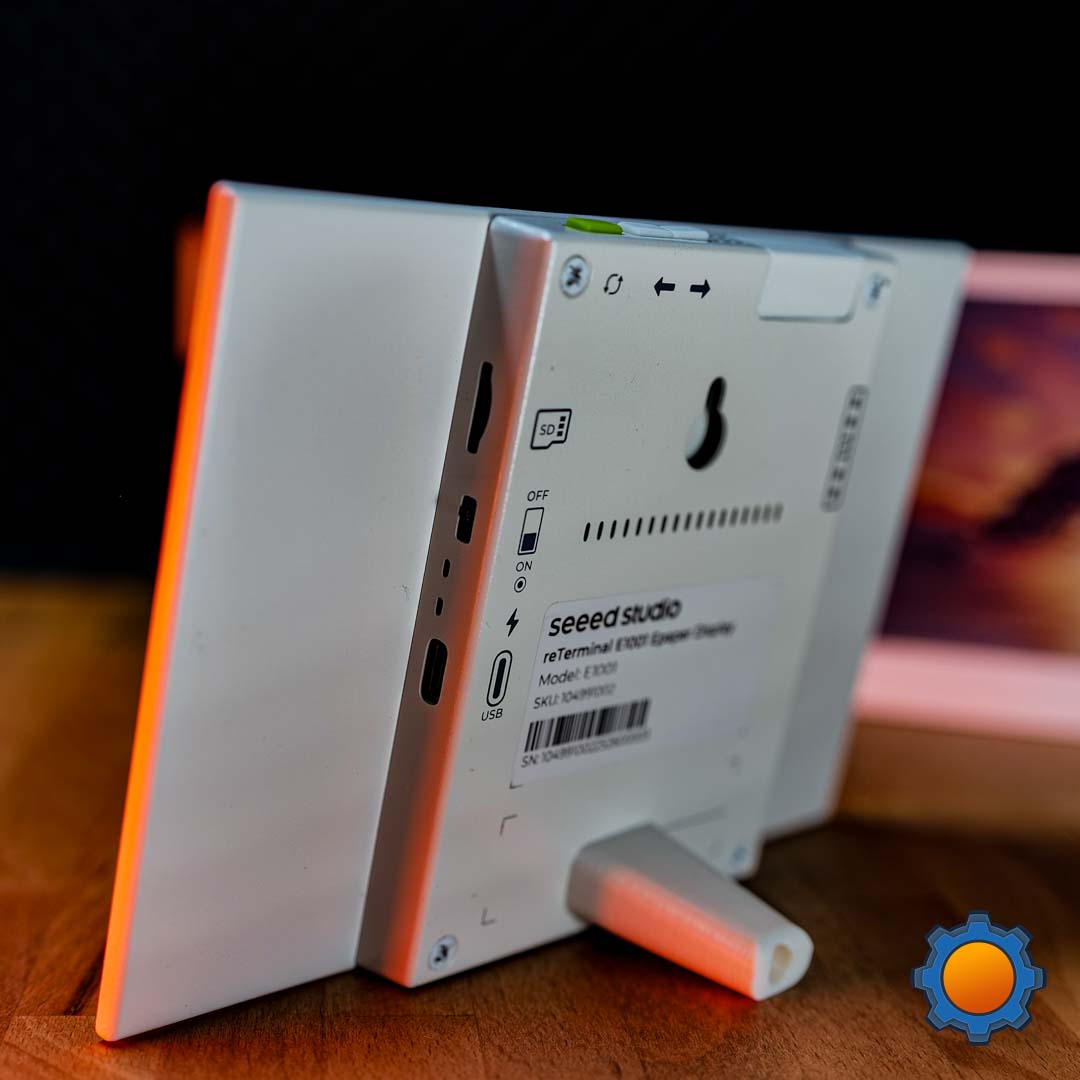
Both units are enclosed in a powder-coated metal casing that exposes a USB-C port for charging and interfacing, a buzzer, a microphone, 3 buttons, a micro SD card slot (32GB) and an 8-pin GPIO for further expansions. The reTerminal E1001 and E1002 can be powered via USB-C port, but they also carry a battery (2000 mAh) inside, so you can take advantage of wireless operation, and keep using it for up to 3 months.
As the reTerminal E1001 and E1002 are easy to open, I removed the metal enclosure to peek inside. At the heart of each unit sits ESP32-S3R8 with 8MB RAM and 32MB of flash. It enables reTerminal E1001 and E1002 with 2.4GHz WiFi and Bluetooth 5.0. There are a couple of unexpected treasures inside. The reTerminal is equipped with a humidity and temperature sensor. There is an onboard RTC (although mine came without a CR1220 battery, so check your unit first) and a connector to add a touch interface!

If you are looking to flash other firmwares (reTerminal supports SenseCraft HMI, but also TRMNL (coming up) and ESPHome), then the boot and reset buttons are hidden under the hood, should you need them.
Units can be wall-mounted thanks to embedded brackets, as well as placed on a desk using the included 3D printed miniature leg.
Less coding, more action

It took me the best part of the weekend to learn how to make dashboards on Seeed Studio Xiao 7.5″ e-paper display. I could see why learning basic interactions with Home Assistant and finding tools to design and scale the interface to my monochrome e-paper could put someone off. I love challenges like this, but I have been doing this for a better part of the decade.
Both reTerminal E1001 & reTerminal E1002 support SenseCraft HMI – a dashboard design tool I have never heard of before. Advertised with AI tools to make dashboards for you from text prompts, I was highly sceptical.
I decided to give it a go before exploring other options (like support for various firmwares and TRMNL). There were some teething issues (QR code pointed me to a dead link, firmware did not allow me to add the device), but I quickly overcame these. Navigate to SenseCraft HMI, create the account, and scroll down to the device flasher. Re-flashing the firmware fixed the pairing code not being compatible.
SenseCraft HMI is a very pleasant dashboard interface where you can design your dashboards in seconds*. The interface is split between various dashboard tabs:
- picture – if all you need is a picture frame
- canvas – DIY dashboard
- RSS feed – for headline maniacs
- Web – for displaying a random page or dashboard from Home Assistant or NodeRED

Canvas is where you’ll spend most of your time, unless your dashboard needs are as simple as displaying the Home Assistant page or a picture (this takes 5 seconds to set up). Canvas is also where AI chat is present, allowing you to start your dashboard by designing it.

*AI will give you a decent template in seconds, but you’ll have to tweak it.
I’m one of the first to try SenseCraft HMI and give feedback, so while I really like the direction this is taking, there are some shortcomings. I had to find a workaround. The biggest problem right now is that all basic canvas options are hardcoded. Except for the Data tile, there are no ways to pass parameters to shapes and fonts. It’s a serious limitation of the graphical interface, but I think there is a workaround:
Without Data
 {
      "id": "printer2-name",
      "type": "data",
      "x": 420,
      "y": 30,
      "width": 240,
      "height": 28.8,
      "dataKey": "name",
      "fontSize": 24,
      "fontWeight": "bold",
      "color": "#000000",
      "textAlign": "left"
    },
With Data
{
      "id": "printer1-name",
      "type": "data",
      "x": 30,
      "y": 30,
      "width": 240,
      "height": 28.8,
      "dataKey": "test_key",
      "fontSize": 24,
      "fontWeight": "bold",
      "color": "#000000",
      "textAlign": "left",
      "decimalPrecision": 3,
      "dataUrl": "here to use data",
      "dataTransform": {
        "type": "dateFormat",
        "options": {
          "dateFormat": "MM/DD/YYYY",
          "timezone": "local"
        }
      },
      "dataHeaders": {
        "Header-1": "s"
      }
    },
You can export the .JSON file of your dashboard and embed parameters into it. You’ll have to tweak the key:value pairs to parse your data, but the new .JSON file should be ok to re-import with dynamic elements.
Another limitation of the system is that the Data option only supports publicly available API. My experiments with trying to get some data from my local network failed miserably. I spoke to Seeed Studio reps about this, and the functionality of SenseCraft HMI will expand significantly with time. Until then, I have to drop my plans to run reTerminal as a 3D Printer dashboard! Watch this space, though, as I’m not giving up on the idea just yet!
Ideas?

Colour vs monochrome? It’s a tough choice as you’ll spend $79 for reTerminal E1001 ($69 on launch), but if you want to add some flair to your graphics, then reTerminal E1002 will set you back $109 ($99 on launch). Either way, these are interesting devices, and as the web dashboard designer gets more features, it will be quite exciting to try things out.
All I have to do now is think of a good project that will put that colour display to use. For now, perhaps updating reTerminal E1002 with pictures from my CCTV while adding AI-generated, cheerful captions could be a way to go.
Other firmwares

As SenseCraft HMI is lacking local URL support for now, I tried adding reTerminal E1001 to ESPhome and see how difficult it would be to port my energy dashboard from Home Assistant I wrote for the Xiao-based e-paper display covered a couple of weeks ago.
There is a very handy Wiki page that walks you through the process of mapping the hardware in ESPHome yaml, but for the most part, mirroring the project was as simple as flashing new firmware via Home Assistant plugin after making some changes and adding the newely created device in Home Assistant (don’t forget that step, it took me 4h to figure out why I’m not receiving any data to my device!).
Final thoughts
I’m in love with reTerminal E1001 and E1002! It’s simple to use, letting you focus on what really matters, rather than spending hours optimising the display of your HMI. If you already have a web-based dashboard, making it visible is as simple as pasting the URL in the right field. The only thing you have to decide now is: monochrome or colour? Let me know what you think in this Reddit thread.
🆓📈 💵- See the transparency note for details.


