Although I own a domain .com this is hardly a professional affair. In the 21st century, anyone with 0.99$ can own one for a year, with a more or less sophisticated address. Initially, proud of my personal space after the move, I quickly realised that IKEA furniture is not going to cut it for much longer. This Swedish piece of student’s elegance has been a culprit of taking 70% of the surface of this tiny box I call ‘my office’. It was time to get it sorted. Before I get to the details, please know that this is my 2nd wood related project, and I learn as I go. Please go easy on me!
Design

Although I like the bookshelf a lot, as it helps me stuff an incredible amount of items inside its compartments, it became obvious on my videos that I’m running out of free clutter space.In addition to that, my desk was making noises each time I rest my arms on the keyboard, and to record anything I had to keep my hands on my lap to minimize the noise levels. I knew I wanted a desk that will be better fitted into the room, It was the time to get on top of cable management, and declutter the shelves in the process.
I didn’t have a budget, but my goal was to spend as little as possible. I became an owner of an MDF 2400mm x 1200mm x 25mm board for a £35 and a piece of a straight block of wood for another £6. I spend a few more pounds on screws and L-shapes brackets to keep things in place. As you can see, the general plan was to keep things cheaper than a new desk.
Measure things right
It’s crucial to get the measurements right. It saves you time and money. My working area would be 190cm x 160, and booth of the car could fit the 80xm x 130cm max. I have ended up with 3 boards roughly 80cm x 120cm. I wasn’t sure what design I will go for. I fancied curves and stylish finish, but I have MDF and a jigsaw.
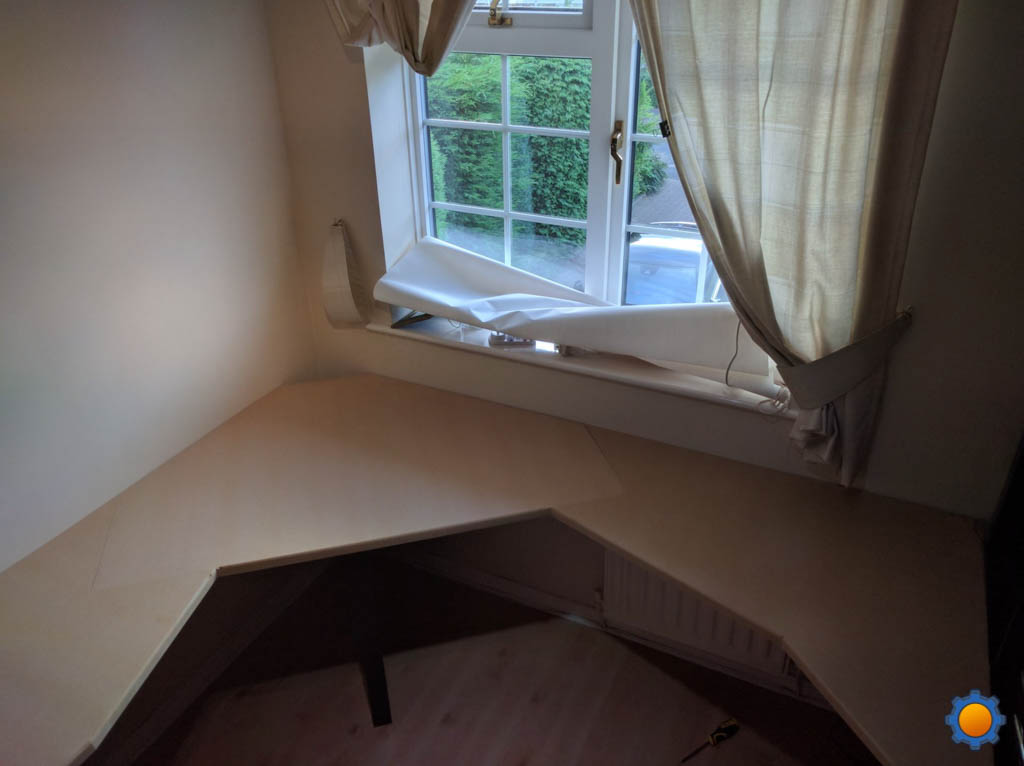
It took me only a few minutes to come up with a basic shape. Something felt good about these angles, it was time to get the boards down and arrange it. The little bold orientation was a result of my lazy approach to the jigsaw. I was trying to keep all the cuts to the minimum while retaining an interesting shape.
To the workshop (garage)
Cutting was a fairly uneventful affair. All straight lines, simply following made earlier pencil marks. My neighbour helped me with getting the corners rounded using a router, as I was running the risk of getting my fingers cut on the edges of the surfaces.
Lego time
Materials have been cut, all needed tools dragged upstairs, it was the time to put things together. Few mounts for plaster walls helped me secure the wooden rails on which I would rest the sides of the desk. I was intending to reuse fittings from the old desk. This would give me the ability to attached one of the boards to the shelf. From the other (left side) side an old spare leg would support the desk.
It turned out that I was lucky, the wall was fairly straight and my measurements have been done carefully, as all 3 board matched each other perfectly. I wanted to re-use the side panel from my old desk to support the middle section of the new build. It took some fiddling before I was able to place it in a way that does not obstruct access to the desk, and prevents the top from flipping over.
The last step was to add a few L-shaped brackets to secure this thing in place.

Conclusion
I’m happy with the effect. I’m planning to cover the surface with some vinyl, but overall it feels like a lot of space has been saved, while the desk area feels much bigger. I can easily say I have 3 working areas, allowing 2 people to work at the same time. In the next part, I will cover the cable management and the Raspberry Pi station which I’m going to integrate into the project.
Stay tuned for part 2!


